Friday, September 2, 2016

Collins T-368 T-195 VFO to solid state


This started when I read a user's group post by Rick Campbell KK7B about these Collins VFOs that were at least at one time easily available from hamfests at low prices. And furthermore, they could be converted from tube operation to solid state without much difficulty. The advantages are low drift and low phase noise, among other things.
So I started looking around and found one at my local hamfest for $10. The total package is actually an exciter. The VFO covers 1.5 to 3.0 MHz and the chassis includes multipliers to give x2, x4, and x8 ranges. You can see why it needs to be stable if you're going to multiply by up to eight times.
I figured out how to energize just the oscillator section (two tubes) B+ and filaments and had some fun playing with it and measuring the drift. Then into the attic with it for several years, with conversion to solid state a back of the mind notion for "some day", which just arrived this week.
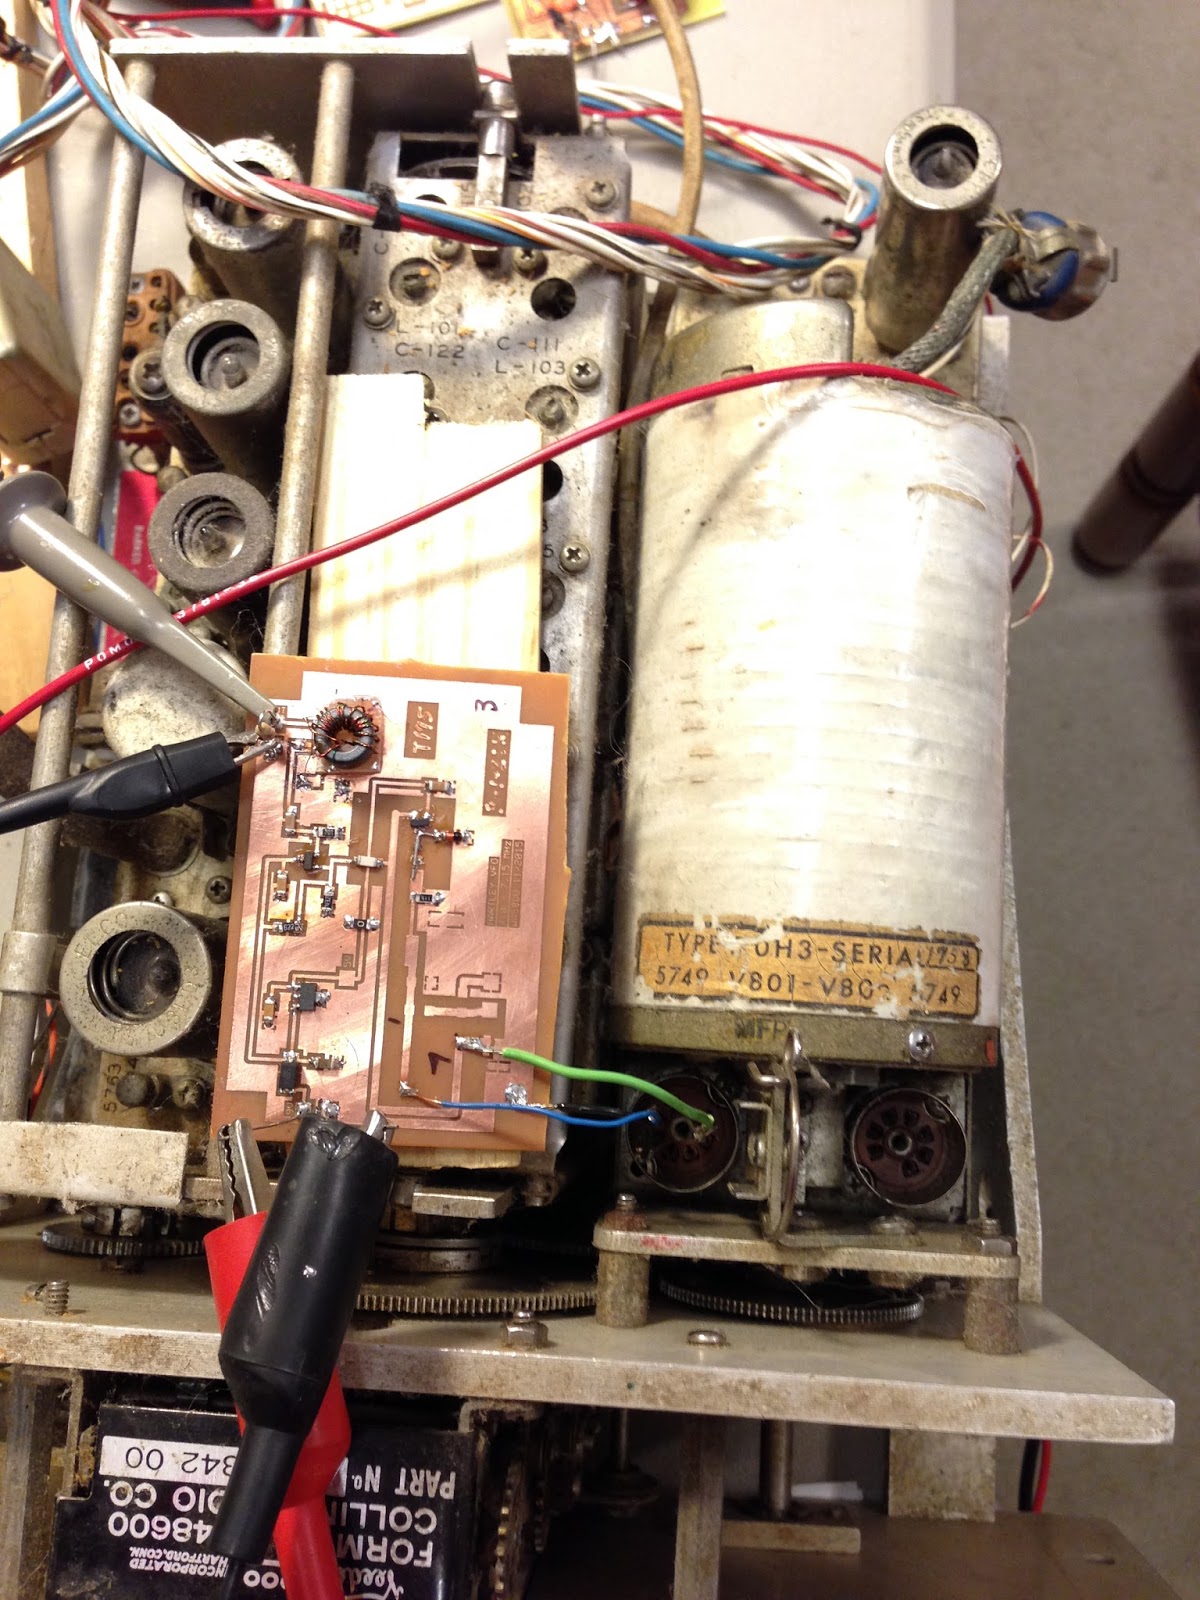
The magic is in that white soup can. It houses the frequency determining circuits. Between it and the front panel you see two tube sockets for the oscillator and buffer.
I found Army manuals for the thing on line and other resources in the form of a web page by John Seboldt K0JD giving lots of good information on doing just what I want to do:

http://www.seboldt.net/k0jd/t368vfo.html

That led to a good article on the subject "Transistorizing Surplus VFOs", QST February 1989, p 45.
The QST article used two dual-gate MOSFETs. K0JD used a JFET oscillator and DG MOSFET buffer. I fooled with that in LTspice but didn't like it so I used a JFET for the oscillator and a BJT (NPN) for the buffer as an emitter follower to give me a 50 ohm output and fairly decent looking sine wave.
It was essentially a Hartley I had built earlier on an SMT board with little SOT-23 active devices, SMT versions of the 2N4416A and 2N3904. I reused that board design although it's much larger than it needs to be since the frequency determining components aren't required.
As seen in the photo, mine is a temporary lash-up although I don't know if I'll ever do it up right. I didn't want to go through the mechanical details of removing the oscillator to get to the bottom of the tube sockets, so I just stuck wires into the correct pins from the top. It worked out well that the nodes I needed to access are accessible on the tube pins.
After getting it all hooked up I've done some checking on stability. It has gone two hours without moving a single Hertz and at other times might move one or two Hertz in a 30 minute period. Actually, I'm not sure my frequency counter is stable enough for this measurement.
I want to mention linearity too, but first I'll put in my schematic. Note that I didn't do any connections to the buffer's tube socket. And to the oscillator I just connected to the top of the tank, the coil tap, and ground.


I'm not an expert on military radio equipment, but with some of the stuff I've looked at it appears that no expense was spared in design or construction. Just first class. 
This unit has a mechanical counter to indicate the frequency. I took readings at intervals of 100 from 1500 to 3000 and plotted them in Excel. The linearity is very impressive although with the vertical scale of the plot it appears a little better than actual. It has to deviate by several kHz from the straight line before you can see it. There's also an offset of about 110 kHz which I can fix after I figure out how to disengage the shaft from the counter and reset it.


That white covering over the soup can is a heater. I thought I might turn it on and get even better stability, but it turns out that the setpoint is 32F! So you can surmise that the stability results from careful selection of components with regard to their temperature coefficients and the heater is just to keep the unit within the range that they can handle.
One drawback is the frequency range of 1.5 to 3.0 MHz. You've got 160, but double it and you only add 80. You'd need to double again for 40. Or heterodyning would be another approach.
If I were going to use this thing "for real", I'd probably add another stage of amplification to get to +7 dBm or more. 
Note that K0JD added a varactor offset tuning circuit. That could be necessary in some applications, but I didn't want to adversely affect stability at this point in my playing.
I haven't considered trying to make any of the multiplier stages functional with solid state components thus far.

OK, fun project.  If you see one, pick it up and have some fun playing with it.

Nick, WA5BDU


Saturday, July 23, 2016

Yet another Arduino and AD98xx DDS Project


These days Arduino Nano boards are as low as $3 each and AD9850 or AD9851 DDS modules can be found in the $5 to $15 range, so the temptation to do something with them is strong. The question is, what is that "something"?

Like most homebrewers, I have DDS units coming out my ears. But I could think of a few specific things I'd like to have in this implementation:

1) Battery powered to make it portable and easy to grab and use with a minimum of fuss.

2) Sealed up as tightly as possible. A current DDS unit I have leaks so much signal out via the power and USB cables and slipshod case that I can't hope to attenuate the output way down for small signal receiver testing.

3) A minimal user interface - no display, PC connection or rotary encoder. This is partially in the interest of compactness, partly to minimize signal leakage and partly just for the challenge inherent in designing such a beast.

4) Lots of bells and whistles as long as they're consistent with #3 above. One model is my Elecraft XG3 signal generator, which has some nice bits above and beyond its basic functions.

First a little about the hardware. Jim Giammanco N5IB was really the guy who kicked me off on this project with his DDS and Arduino Nano Experimenter's Board. It's a very nice board designed to handle the interconnections, power distribution and filtering for an eBay DDS module with an Arduino Nano in a stacked configuration. Unused pins are brought out for the programmer to play with.

Info on the Experimenter's Board is found on the PHSNA Yahoo Group site and also on Jim's page linked here:

 http://n5ib.net/Index.xht

User interface

The user has to be able to communicate with the system and vice-versa. I went with three little SMT pushbuttons for user input and with a miniature speaker for the system to talk back via Morse code. So the ham who is fluent in Morse is at a bit of an advantage with a UI of this nature.

In its simplest, top level operation, the user taps switch S1 to have the frequency announced and S2/S3 to step the frequency Up/Down.

But we want to be able to do a lot more so a menuing system is needed. I went with a system I'd seen in Steve Weber's ATS-3 transceiver and in the NORCAL / Dan Tayloe Stinger Singer frequency counter. The user holds S1 down and the menu options are played in a loop, a single letter for each option. The switch is released after the desired item is heard.

Features & functions


  • Tap a button to have the frequency announced in Morse
  • Tap Up/Down buttons to step the frequency. Hold for rapid stepping.
  • Change frequency step size, 1 Hz to 1 MHz in 10x increments
  • Change bands. Step through ham bands 160, 80, 40, 30, 20, 17, 15, 12 and 6 meters.
  • RF On/OFF - can turn off RF output without powering down the unit
  • Send CW - a test CW message is sent repetitively via the RF output
  • Send RTTY - a test RTTY message at 60 WPM, 170 Hz shift sent repetitively
  • Save current frequency to scratchpad EEPROM memory
  • Return to frequency stored in scratchpad EEPROM memory
  • Announce power supply or battery voltage in Morse (audio)
  • Update (save) current frequency / band & step to EEPROM so subsequent start-ups will start there.
There's also continuous battery monitoring and a low battery alarm if it drops below a threshold.

Power supply

The experimenter's board has provision for an LM7805 regulator and the Nano board can also accept 12 V supply voltage and use it's on-board regulator. But after exploring various battery options I decided to go with six (6) NiMH AA cells, which gives me a supply range of about 6.3 V to 8.4 V.  I definitely wanted batteries because opening and closing the box with wires running everywhere isn't fun.

I decided to go with a buck switching module with 5 Volts output as can be found on eBay for a dollar or two apiece. This one is the size of a postage stamp and is about 89% efficient. It doesn't drop out until the input reaches < 5.5 V. So I'm operating both the DDS and the Nano board from 5 VDC. I was surprised that my current draw was only 100 mA with this system, so I can get about 18 hours of operation from my 2000 ma-hr batteries. I put a 2.1 mm charging jack on the back of the box.

Here's the regulator:


And here's the box with the Arduino / DDS stack on one side and the batteries and regulator on the other:


I wanted to use a die-cast box but didn't have one the right size so I used a Radio Shack aluminum box that is reasonably tight and overlaps on most of the edges.

Trying it

One of the first things I wanted to do was to box it up, put on a 50 ohm terminator and see if I could hear it in my K3 with my big ham antennas connected. I could not hear it at all on 40 or 20 meters. On 6 meters I hear it faintly, but it doesn't move the S-meter. Of course, plugging two or three feet of wire into the BNC makes it loud and clear in the receiver. I'm not sure if I'll be able to attenuate it down to 1 uV with external attenuators or not. We'll see. But S9 shouldn't be a problem.

Some specifications

The output is a sine wave of about -7 dBm into 50 ohms which of course varies a couple dB over the wide frequency range.

The frequency range is 1.8 to 54 Mhz. Actually, it should go to 60 MHz and I found on the lower end I could go to 100 kHz before output dropped too much. A larger coupling capacitor should help those interested in going all the way down to audio. Oh, there's a transformer too, so more mods would be needed to emphasize audio frequencies.

My unit uses an AD9851 module. It can be built with an AD9850 module which would put the top end somewhere above 30 MHz. BTW, I followed the PHSNA hardware guidance and replaced the filter on the DDS module, said to be inferior, with an external one.

What's good, what's missing?

I said I used the Elecraft XG3 as a model. A big advantage it has is internal attenuators giving you four selectable output levels of -107, -73, -33 and 0 dBm. Switchable internal attenuators was more than I wanted to take on at this time.

But the XG3 can't tell you what frequency it's on.  It has band indicating LEDs but you have to jot down actual frequencies or use the USB to PC interface and software to be reminded of what they are. Also, it does not allow adjusting the frequency in steps.

The XG3 has a square wave output. It's credited for giving harmonic marker signals up into the GHz range. But I didn't really like the square waves for stuff I'm doing.

Where's the source code, schematics and other good info?

I put the source code and a "user's manual" kind of document in the files area of the PHSNA group.


And Jim's PDF describing the experimenter's board is found both there and on his site, linked earlier.

For those who don't want to sign up for the PHSNA group, I'll be glad to email the files or make them available somewhere else.

That's it.

Nick, WA5BDU
kennnick@gmail.com


Sunday, June 12, 2016

Honda eu2000i generator waveform

I was testing out the generator two weeks before Field Day so I decided to do something I've wanted to do, which is look at the waveform on my oscilloscope. Is it close to a sine wave?

I approached this with a little anxiety because, what if I accidentally hook the scope probe's ground lead to the hot side of the line?  So I took some precautions.  First, I connected the generator's ground terminal to the ground wire at my meter. Inside the house, I plugged an extension cord into the wall and verified that I knew which side is the "hot" side on the other end. I verified 120 VAC from that side to system ground (the case of a piece of equipment with 3-wire plug). I looked at the utility's waveform on my scope and it looked OK. I didn't need to hook up the grounded side of the probe, since all grounds are common.

Next I unplugged the cord from the wall and took it outside and plugged it into my Honda eu2000i generator. I also plugged in a 60 W lamp, for just a bit of load.

I came back inside and re-checked the voltage on the hot lead to ground with my DMM. Here's where I got a surprise. Instead of 120 VAC, I read 60 VAC. So I moved the probe to the neutral lead and it's also 60 VAC.  What's going on?  It looks like the ground terminal on the generator is at the center point of the output, not on one side. Unless I'm missing something.

Here's what the waveform looked like:


Pretty good!  It actually looked a bit more sine-like than what was coming out of the wall.

73-

Nick, WA5BDU